Toast Notification
“A fairly handy method to keep the user community a bit more informed or bothered. ”
INTRODUCTION
This document will outline the steps necessary to change and deploy Toast Notifications throughout the enterprise as a means to communicate important upcoming events or changes. In addition we provide an architecture of the overall process below.
ARCHITECTURE
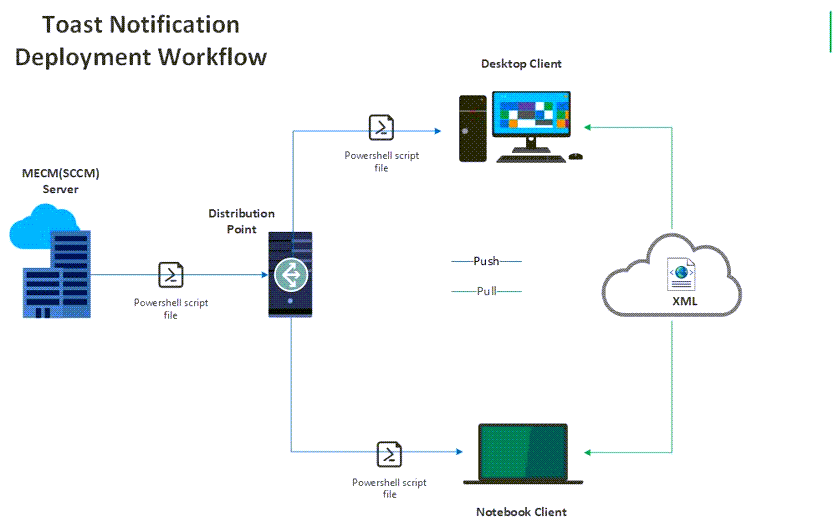
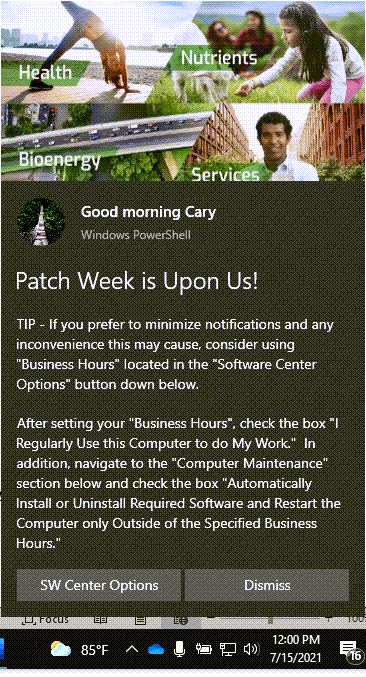
This process takes advantage of a pre-existing PowerShell script provided by - Windows 10 Toast Notification Script – imab.dk. The script has been modified to suit our needs and wrapped in an EXE / Digitally Signed Certificate. A XML configuration file is used to render graphic and textual changes as portrayed in the following example:
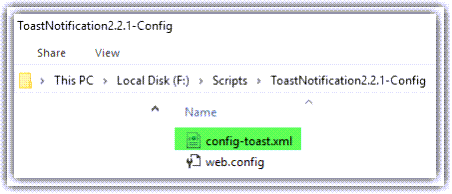
The XML configuration file size is roughly 12k and is downloaded by the client upon each deployment. The XML configuration will be stored in Blob storage via Azure. Currently it is in the following path on the SCCM server:
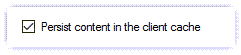
This approach gives us additional reach for clients off network as well as one simple change Locale. The Executable is distributed globally. Upon initial execution, the client will download the Executable which will remain in Cache for future deployments.
This provides a much more rapid response and consistent experience as our notifications progress.
The Application component is delivered through Software Center but remains hidden with no additional notifications that one would typically expect for a standard deployment. The installation is Per User. An Action Button is included and seems to work with most Executables / Shortcuts / Scripts.
OPERATIONS
Since there is one change Locale for any new notifications, we simply open the file in Blob storage using an XML editor and focus our efforts on the following areas (these are obviously subject to change):
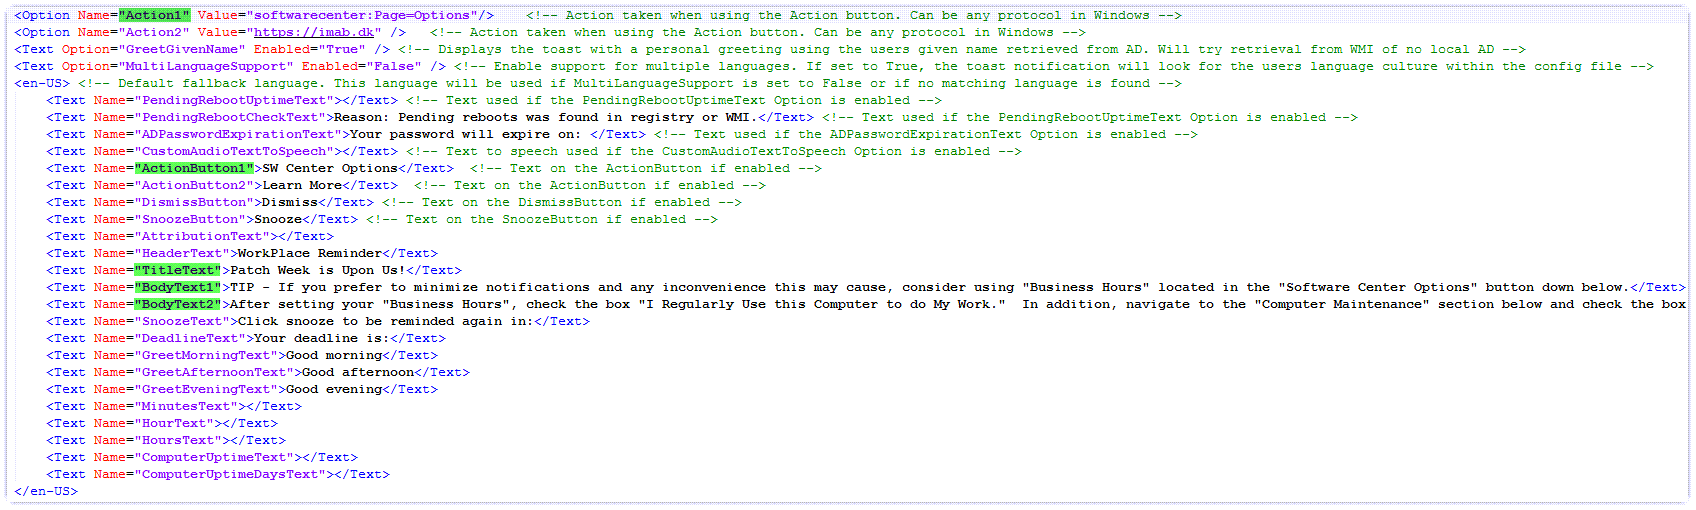
The aforementioned changes can be referenced in the Toast Notification graphic provided earlier. Once you are satisfied with your changes Save the XML and prepare for Testing.
Testing
Before ANY deployment we test our changes initially on ourself as well as our departmental victims 😉. This confirms what our business users can expect to see. This can easily be accomplished by creating a collection and assigning devices.
Deployment
The actual deployment should be a fairly simple process. Navigate to the following location under Applications:

After executing the Deployment Wizard select the All Workstations collection for targeting. Under Deployment Settings make note of the following requirement:
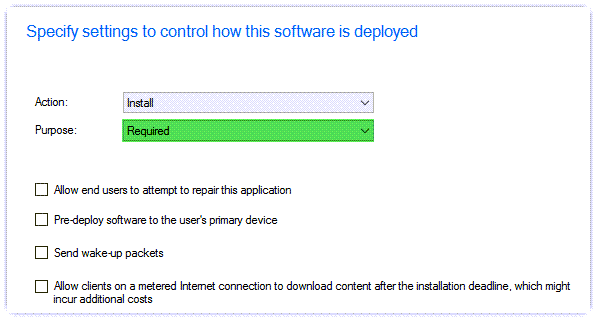
Under User Experience make not of the following requirement:
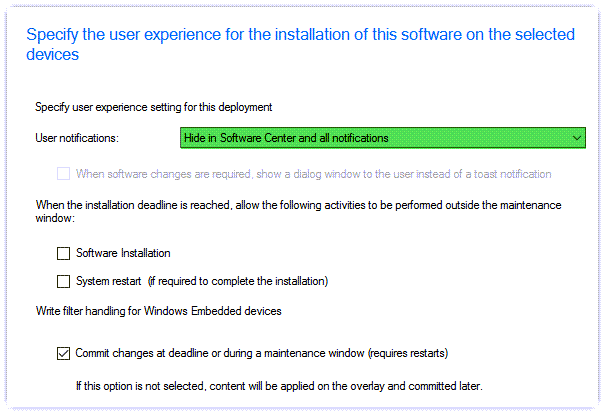
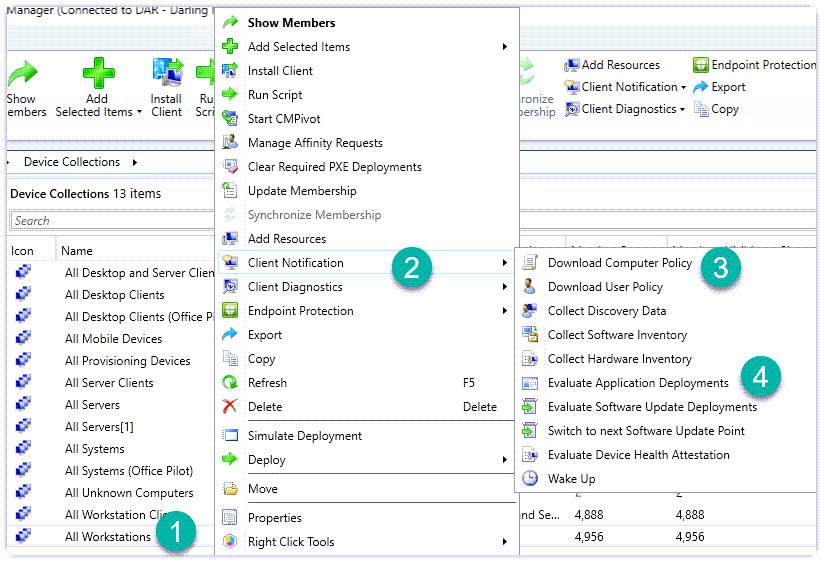
Complete the Deployment Wizard and we are done. Clients will honor the Application Evaluation Cycle which is configured to run Daily. In the event you need to accelerate the deployment, you can right click the targeted collections and choose the following:
That’s it….Happy Toasting!!!